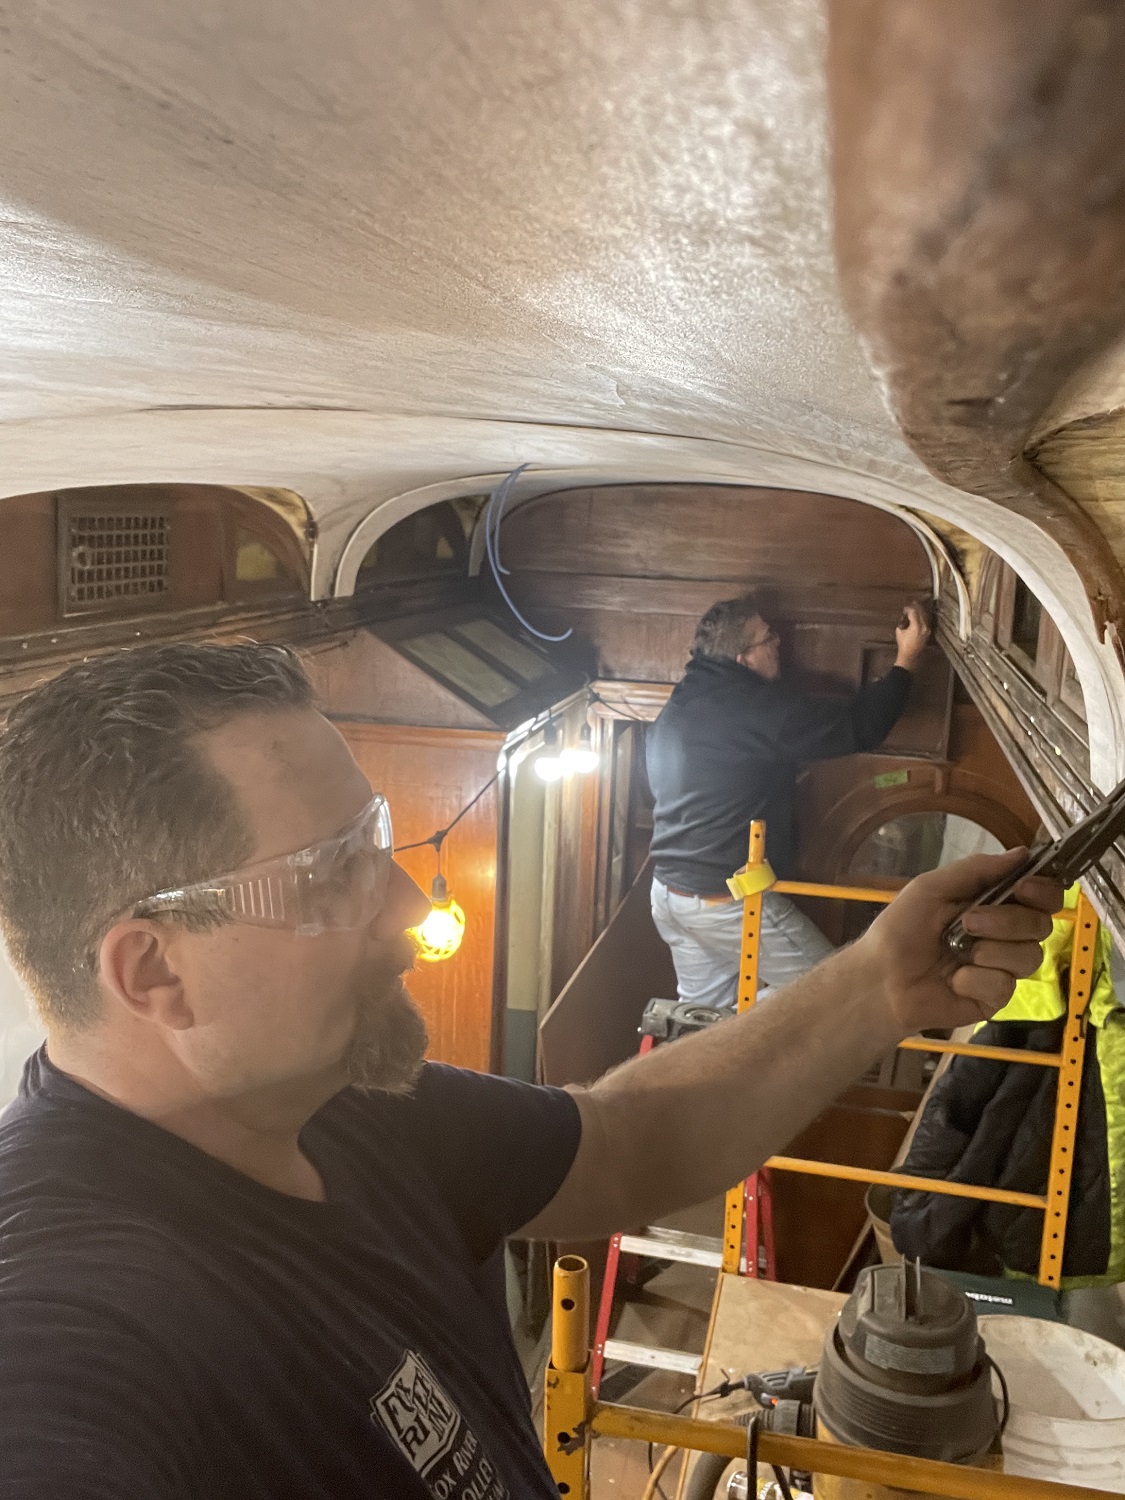
Here we see Manny Dunn and Jeff working on trimming the ceiling panels so that the face trim can be reinstalled just below. It is the piece that covers the wire groves.
The arched window openings have now all been cut out of the new ceiling panels.
Next, a belt sander was used to smooth the panels to the arch. All the paint has been removed from all the arched areas. The trim pieces that mate the connection of the arch and the ceiling were painstakingly removed earlier.
The crew then went through the process of repairing all the trim. The final step was to give them several coats of boiled linseed oil, and it’s a darn good thing we did! When we removed these pieces they were as brittle as could be, but now during reinstalling them, they bent and flexed, “kinda”.
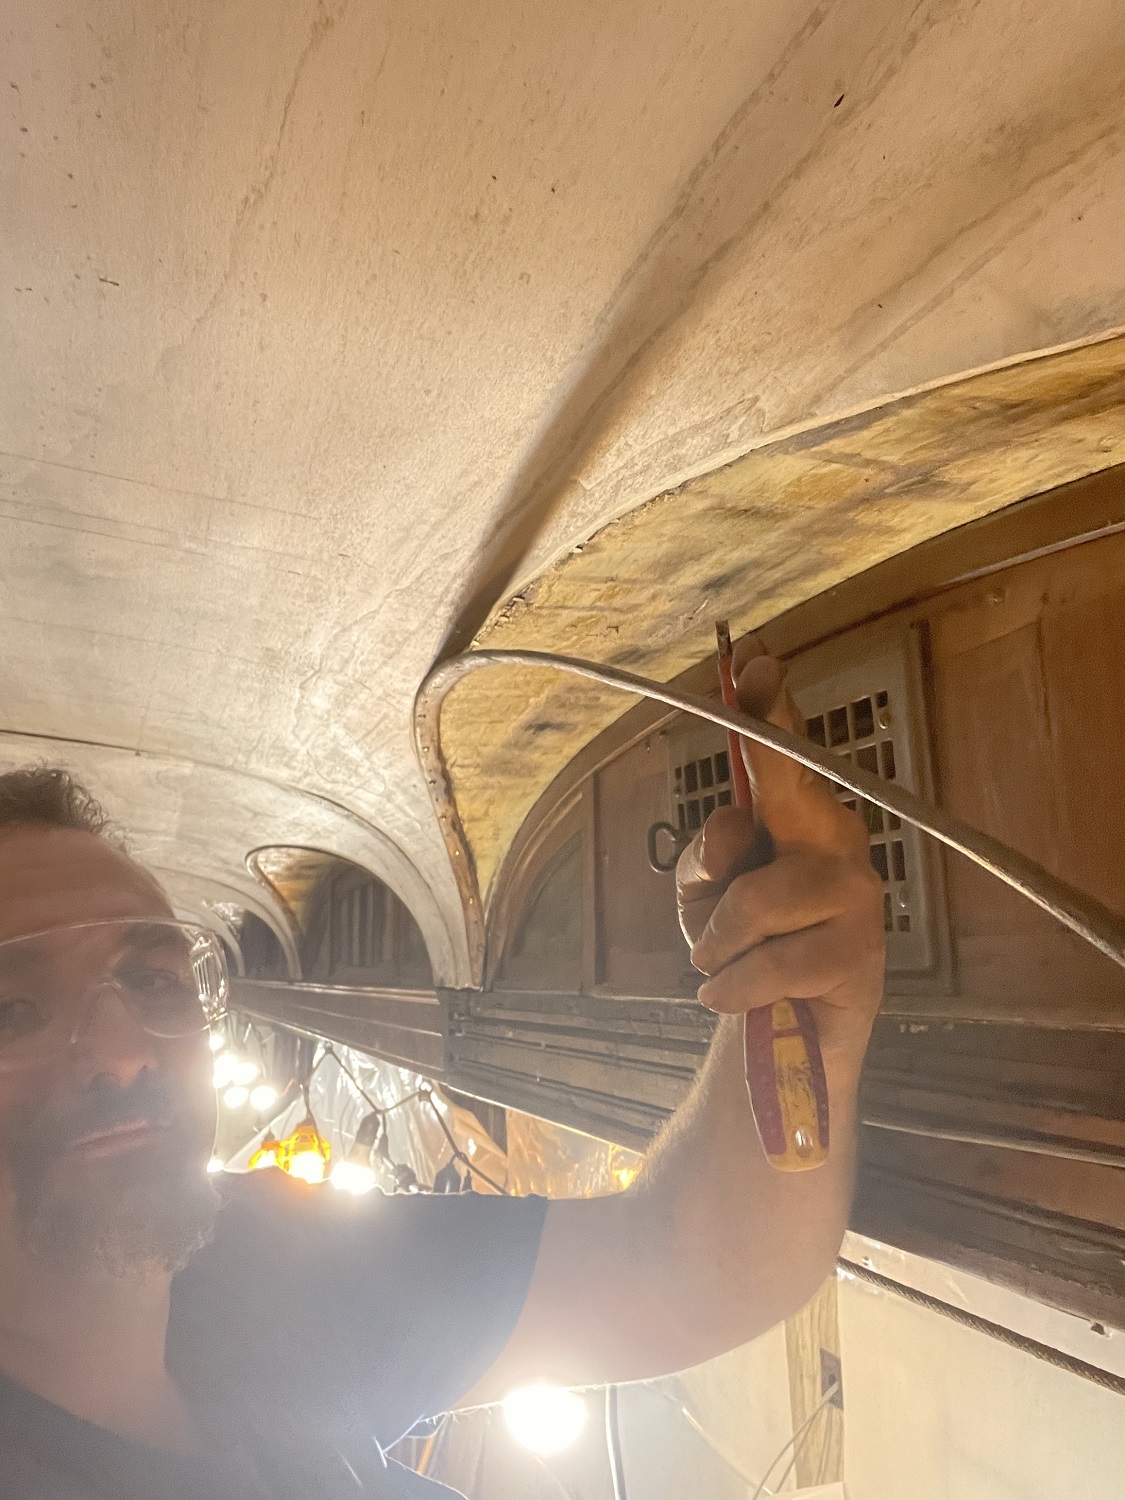
Here is installing a trim piece. It’s a slow process of installing one screw, forcing and bending the piece to the right angle, holding it there and installing the next screw. Each piece has 20 screws! We did not get all the arch trim in, as it’s about an hour per arch. We did get four done, and all the trim reattached just below the arches.
We also took the time to remove each vent diffuser for cleaning and service.
Next, any piece of stained glass that needed attention was removed for later restoration.
The ceiling is really flying along, thanks to all the great volunteers.